
Lithium Swap 4 - The Batteries
Of course, the whole point of this exercise was to put the batteries in the car, but so many side projects that go along with that.
The batteries in question are Thundersky LFP160AHA lithium iron phosphate (LiFePO4) manufactured in China. These batteries were popular with EV conversion enthusiasts because of their prismatic design, reasonably low cost and because they are one of the more safe lithium chemistries out there. There are other lithium designs that have a higher energy density, or can produce higher discharge rates, etc. but many of those have drawbacks that hobbyist user find undesirable.
Each cell is 3.2 volts nominal, at 160 ampere-hours. The usable capacity is something more like 120 - 130 aH, as the bottom 20% and top 10% are not available for use. Reading the manufacturers spec sheet, these batteries have an expected life span of 2,000 cycles at 80% depth-of-discharge, and 3,000 cycles at 70%. In my application, this translates to approximately 100,000 and 150,000 miles of use, respectively. Compare this to 500 to 1,000 cycles at 50% depth of discharge for lead-acid, and you begin to get a sense of what the improvement in performance is about when switching battery chemistries.
Hefting the groups of cells out of the truck was a back-breaker, but I got it done with the help of some 2x6 lumber and my hand truck.
Like everything else in the truck that I purchased, the batteries were covered with dirt, and had the added bonus of having styrofoam crumbs wedged into every crevice and corner. I didn't want to hose them down, so I ended up using the vacuum, a stiff paint brush, and finally damp rags to clean the exterior of the cases.
The major effort in getting the cells ready was that the previous owner hadn't applied any sort of anti-corrosion compound to the terminals before assembling, so every terminal post was tarnished and/or corroded. The cells have one each aluminum and copper terminals, and each needed attention. The dissimilar metal types where the copper cell straps were connected to the aluminum cell terminals was probably the worst, there was actual corrosion when electrolysis had set in.
Many of the terminals had evidence of heating, and a few had actual places where an arc had started under heavy load. The stainless steel bolts that held the straps and cables to the cell terminals were all very tight, some distressingly so. No anti-seize compound had been used on them, and I couldn't tell if the'd been over-tightened, or were just corroded like everything else.
To break the oxide layer on the terminals, remove the heated surfaces, and level the mating surfaces, I used a flat file on every terminal to file a new, level surface into the metal. The terminals that had been arced were the most difficult, the arc had caused a tempered surface to form, and the file wasn't very effective at cutting it. I spent a bit of time with a sharpened ice pick and an exacto knife carving the hard spots out before filing.
Once the terminals were leveled, I ran a metric tap into each terminal to chase out the treads and provide a clean thread root for the strap bolts when they were put back in. The bolts themselves were all run clean on a wire wheel in the bench grinder.
Each cell was renumbered, the felt marker number erased with acetone on a rag, and a new wire marker adhesive label applied in a logical numering sequence for the packs new configuration.
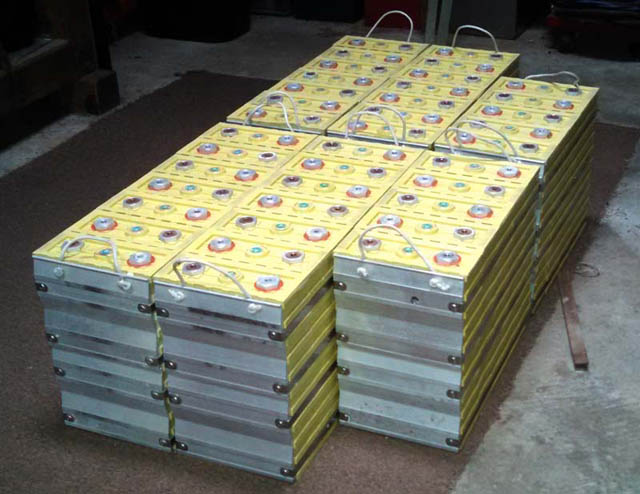
From the beginning, I had been eyeing the size of the cells, their gathering into modules, and making semi-precise measurements of the space in the car where they would be placed. As installed in the purchased truck, there were four modules of seven cells, and two modules of five cells , for a total of 38. They didn't have to stay in this configuration, but leaving them as they were would be a lot easier. Lithium cells have to be compressed to prevent them from swelling, and these had been constrained in factory frames. Changing the configuration would be another construction project, one I didn't particularly want.
My measurements seemed to indicate that I'd be able to fit the cells into the car in a modified "T" shape, two modules of seven cells each, end to end, and side by side with a similar module set. Behind this, the two remaining five-cell modules would fit between the rear wheel strut towers in the car. It all looked pretty good on paper, but I was going to have to assemble it, and then dig into the car and get more precise measurements to see if the fractions of an inch clearance that I thought I was going to have would really be there.
I lined the cell modules up on the garage floor, and took more measurements. it still looked good, but it would be close. It was time to dig into the Rabbit and see what the reality of the battery compartment revealed.
Original material ©1996-2025 Mr. Sharkey | All rights reserved