
Modifications to EV Rabbit
EV Modifications
Aside from the obvious fact that my Rabbit has been converted to electric power, there are a few items that are "over-stock", or have been added to supplement the car's original design:
Brakes:

Front: Vented rotors from a 1983 Rabbit GTI
Rear: Converted to disc brakes from a 1987 VW Jetta GLI
Lines: All of the flexible brake lines have been replaced with Teflon lines which have an outer covering of braided stainless steel. This modification improved the feel of the brake pedal, causing less travel and a more solid sensation. Considered essential when converting over to rear disc brakes.
Master Cylinder: An upcoming project is to install the "hydraulic modulator" from a VW A2-series car equipped with an anti-lock braking system. Although I don't have any plans to actually get the ABS system operational, the modulator has a built-in hydraulic pump, providing power brakes without the vacuum booster, and the attendant vacuum pump required to make it operate.
Suspension:
Koni "Red" shocks and struts.
Polyurethane bushings throughout, control arms, steering rack, anti sway bars, rear axle beam pivots.
Front suspension includes the anti-sway bar from a 1982 Rabbit GTI, and custom front upper and lower stress bars as well as a sub frame brace at the rear of the front control arms, all visible along with a glimpse of the urethane bushings, in this image.

Upper custom stress bar:

A rear anti-sway bar from 1988 Rabbit Cabriolet was modified and fitted to the rear axle beam. Because the SCT factory had added stiffening material to the swing arms, the stock bar was too short to reach the location that the rear bushings would fit, so it was necessary to lengthen the ends of the bar by 3", using material sawn from another Rabbit sway bar.
The stock Rabbit axle beam was also modified by the SCT factory to provide independent suspension to the left and right wheels. This was accomplished by splitting the beam in two and fabricating two new center pivot bushings:
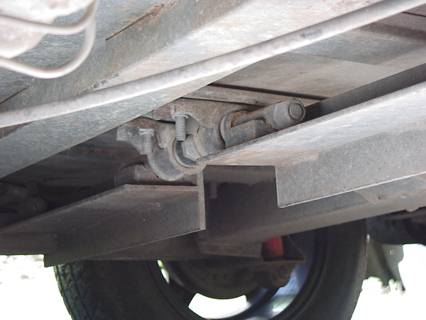
The rubber bushings in this early photo have been replaced by urethane bushings.
Body:
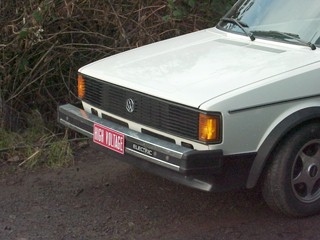 |
Eagle 5-spoke, 13"x 5" alloy wheels Rabbit GTI front spoiler and wheel arch flares Rear air deflector to provide additional cooling to pusher trailer |
|
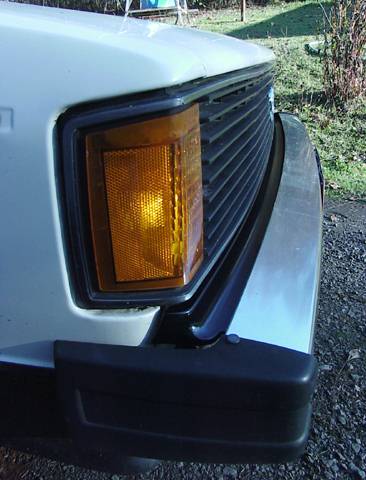
Covers to conceal the headlights, made from stock grille material. In addition, the front bumper mounts from a 1984 Rabbit have been installed. These mounts are of the solid type, instead of the typical U.S. "bumper car" shock absorber mounts. This results in the bumper being about ½" closer to the body, and takes away that odd appearance that the bumper isn't actually part of the car. Additionally, the trim valance from the same model Rabbit was fitted, which conceals the gap between the bumper and the body. |
 |
Instrumentation:
 |
A VW GTI gauge cluster is mounted in the center console, containing the dual range expanded-scale 260° sweep voltmeter, a Cruising Equipment Co. E-meter digital multi function meter, and a +200 / 0 / -300 amp 260° sweep ammeter. |
The E-meter has a serial port output which can be connected to a laptop PC for data acquisition and logging. By importing the results into Excel, I'm able to create charts showing the relationship of battery voltage, motor amperage, and state-of-charge, all graphed against time. By keeping notes of any given trip, I can relate the data to terrain, traffic conditions, and locations. Just another diversion available to those of us who eschew internal combustion machines.

Following the blue line, we see significant discharge currents at the beginning of the trip, which represents surface street driving and acceleration when entering the Interstate highway. About 09:25, the Pusher trailer assumed the majority of the load while operating at a steady speed on the highway, and some amount of regenerative braking replenishes the power used earlier. Large upward spikes in this line of the chart represent regenerative braking used to decelerate the vehicle at stop signals and when exiting freeway off ramps. At 09:52, I exited the freeway and drove the remainder of the trip on rural roads with some traffic stops along the way.
This chart represents about 50 miles of driving. Note that the number of ampere-hours consumed from the battery pack (yellow line) totals about -20Ah. Use of the Pusher trailer conserves battery power and can even eliminate battery power consumption if care is taken in it's operation.
|
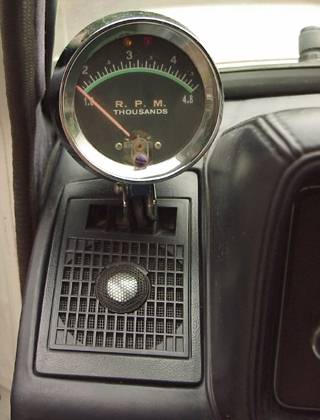
The custom, expanded scale tachometer is mounted on the upper left of the dashboard, well within the driver's view. At 4000 RPM, a yellow LED illuminates in the top of the tach to draw attention to the end of useful motor speed. At 4500 RPM, a red LED also illuminates. Fragmentation on the motor in this car is 8000 RPM, so I have a good deal of headroom on motor speed, but anything much higher than 4000 yields a drop-off in acceleration. Below the tach is one of two Diamond Audio 3¼" two-way speakers with the dome tweeter projecting through the plastic grille, part of an ongoing stereo installation project. |
 |
Interior:
Like most VW Rabbits, the headliner in this car is in dire need of replacement. Fortunately, the rest of the upholstery is in quite good condition. During one of my visits to the wrecking yard, I came across a van that had been completely carpeted inside with blue pile carpet that matched the interior of the EV perfectly. A few day's spare time later, I had constructed a deck over the battery compartment and covered it with the better pieces of van material.

Two lift-out covers at the rear of the deck allow access to the battery charger
and allow me to check several of the batteries in the pack for water level.
The entire deck is easily removable for battery service.
Stereo:
I have to admit some level of defeat here. I'e been attempting to install a quality sound system for some time, and have not been able to get a satisfactory result. Rabbits don't have a lot of room in the dashboard for speaker placement. 3½" is all the bigger the dash speaker locations can be fitted with. After trying some Polk Audio speaker in the dash, I was very disappointed with the sound, and removed them to be replaced with Diamond Audio two-way speakers. These units have a much smoother sound, and the metal dome tweeter disperses the high frequencies in a much more efficient manner. These speakers are driven by a 35 watt Carvin amplifier.
The rest of the system consists of a gutted-out Audiovox head unit, a Denon active crossover, Polk Audio 5¼" two-way speaker mounted in the rear quarter panels, and two 8" sub woofers mounted in the quarter panels below the deck shown above. The Audiovox knob type head unit wouldn't be my first choice, however, it has been extensively altered inside with the cassette mechanism removed and electronics to power and accept an external CD player installed in it's place. The concept here is to make the stereo look from outside the car to be a cheap aftermarket installation, not worth a thief's time to jack.
Three amplifiers power the system, the 30 W/Channel Carven on the front speakers, A Pioneer GM-100, very conservatively rated at 50 W/Channel on the 5¼" Polks, and a Hyfonics Atlantis, rated at 175 W/Channel on the subs. Total amplifier power is 510 watts.
Original material ©1996-2025 Mr. Sharkey | All rights reserved