
Early Crown Photos 4
So, the old walls and roof framing are off, the new framing is up, and it's time to get busy enclosing the interior of the bus.

Before the Fall weather went completely T.U., I managed to cut the roof rafters to length, weld them to the plate and fabricate gussets to fill the little wedge-shaped gap between the bottom of the curved rafter and the horizontal surface of the plate. Everything was painted with primer/sealer as I went, and surfaces that still required welding were masked off and left bare steel. The plastic sheeting and blue tarps were pulled back as time permitted and work moved forward between periods of wet weather.
The plywood jig that I made to erect the vertical pillars was modified to serve as a rafter-setter, it held the to outside walls at a preset distance, determined what was square in relation to the sides of the bus, and set the vertical rise of each rafter. In the end, there were only very small differences in a couple of the rafters that required shimming to make the roof surface a perfect arc from side-to-side and flat front-to-rear.

Eventually, the weather in 1995 deteriorated so much that work on the bus was stalled. The framing made a stable support for the tarps with the help of some 2x4's, drywalls screws and C-clamps. I also fabricated dozens of makeshift C-clamps by cutting sections out of 3" PVC and ABS plumbing pipe, slitting the sections once lengthwise and spreading them over the framing to hold plastic in place. They are visible all along both sides of the bus in this photo.
The amazing part is that this whole mess survived one of the wettest winters that Oregon has seen since I've been here, and the inside of the bus stayed dryer than it ever did with the factory roof and windows!
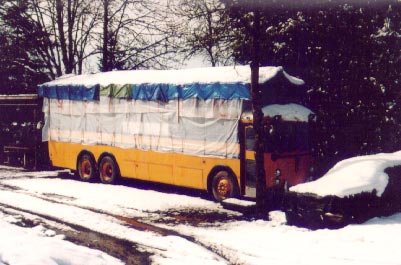
Yes, it even went through snow and wind. Check out the hay bale twine and bungee cord hold downs for the top tarps!
Original material ©1996-2025 Mr. Sharkey | All rights reserved