
Early Crown Photos 3
Once the bus was settled into position on the newly leveled ground, it was time to begin the roof raise.
First, I removed all of the exterior aluminum roof panels by shearing off the inside of each aluminum rivet holding the panels in place, then using a pneumatic hammer with a punch driver end, I drove the rivets out of the metal from the inside of the bus. Tarps over the outside of the roof skin kept these rivets from flying all over the place, but even to this day, I still find them from time to time in the gravel of the driveway, or pushing their way to the top of the soil around the bus.
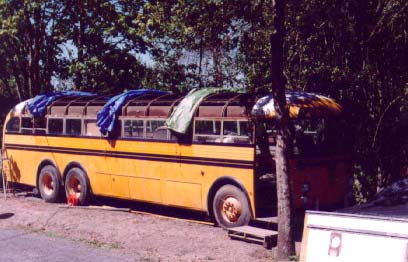
The removed panels were numbered and stacked up for possible reuse on the new roof structure (they were never resued, in the end, I made the new roof one-piece, 40 feet long by 8' 6" wide).
Removing the tarps made it quite light and airy in the summer.
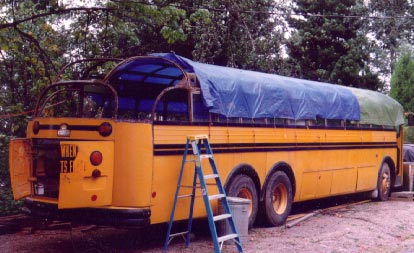
When all of the interior sheet metal was removed, and as I took the trim from around the windows on the outside, I found that all of the wall framing had stress fractures at the level of the bottom of the windows on the right side. Only the first pillar behind the curb door and the last (visible above the ladder in the above photo) were intact. Many of the rest of the pillars had been welded and patched with rectangular tubing, and additional screws set in the structure to attempt to stabilize the metal fatigue. Fortunately, I removed all of the brittle and cracked metal, all the way down almost to floor level. After the demolition of the body, it was quite apparent that the school district had been waging a losing battle with the frame of the body of this bus, which was probably why they sold it with the running gear in such good condition. The body just wasn't safe to carry student passengers any more.

During this stage, I had thoughts about a couple of the rigs in Rolling Homes that had canvas roofs that let in light, danced with the patterns of overhead leaves, and could be rolled back to let the sky into the house. Of course, reality set in when I remembered that I don't live in the tropics somewhere and that a secure, insulated roof above my living space would be more comfortable most of the year...
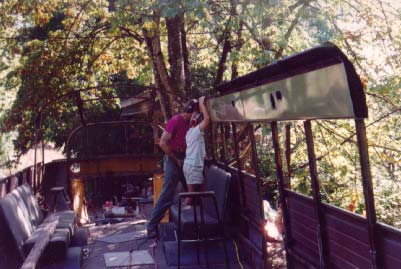
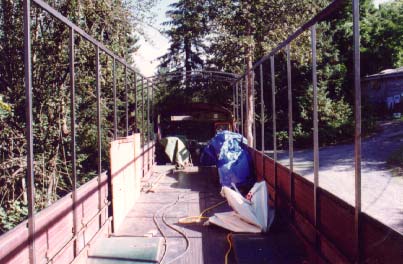
Once the roof joists and associated framing was removed, it was time to take the rest of the walls down. Here's my friend Mark and his youngest son, Jay cutting off the last panel of wall. Mark was responsible for finding the bus in Portland, so I made sure to guilt trip him into coming down for several important phases of the early construction.
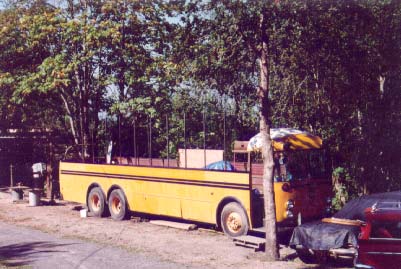
The first step in removing the walls was to cut the pillars at the bottom of the windows. The belting was unscrewed a couple of studs before the place where the new framing was being installed, then the original framing pillars were cut almost at floor level. As the new framing was put into place, the belting steel was screwed to it. This allowed the thick corrugated steel belt panel to stay in place while the new framing was welded in. I did not want to have to completely remove the belt, as it was 35 feet long, very heavy, and probably would have been almost impossible for two people to handle.
Note that the interior walls and ceiling, entire roof and walls were removed a section at a time without the use of any cutting torch or sledge hammer. A die grinder was used to cut through tough welds, and a sawzall and circular saw with a metal cutoff wheel made most of the cuts. My cheapo pneumatic hammer gun with punch and chisel attachments got into tight corners, and in a pinch, a hand chisel and small hand sledge were used to knock stuff loose.
A load of 1 1/4" square steel tubing was delivered in 20 foot lengths, and cut to suitable sizes to make the wall framing. My sheet metal shop fabricated shims that allowed me to use 1" square tubing as a splint inside the 1 1/4", taking up the excess clearance so that the tubes telescoped fairly tightly to minimize strain on the welds that connected the new construction to the original "hat channel" of the bus body.
As the new framing went in, the belting along the sides changed it's position on the bus. Originally, the bus had walls that curved inwards from the floor level, gently forming a barrel shape before making a sharper bend above the window to form the roof. I wanted straight up-and-down walls, so the belting took on a slight twist as it was attached to the new framing, until the last of the old framing was removed and the entire structure was plumb and at a right angle to the floor.
Here the top plate has been installed, a piece of 1 1/4 x 2" thick steel rectangular tubing. The piece of plywood you see covering the emergency door on the left is actually a template that was used, sliding it along the rail that runs just above the floor on both sides which was the mounting rail for the bus seats. It served to set the width of the framing evenly, and to insure that the new framing was parallel and 90 degrees to the floor. The welds that join the new framing to the old are visible at the second horizontal member above the floor.
Also in this pic, you can see the first three roof rafters sitting in place before being cut to length or welded in. I had 14 pieces of 1 1/4" square tubing custom bent in Portland after a local shop destroyed six pieces attempting to arc them on a circular tubing jig. Seems that square and rectangular tubing is much more difficult to bend properly. This will impact later construction, as you'll see.
Original material ©1996-2025 Mr. Sharkey | All rights reserved